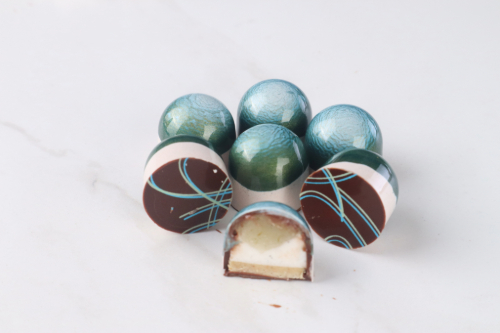
Key Lime Pie Bonbons
Ingredients
- 800g Valrhona Macaé dark chocolate couverture
- 6g Roxy & Rich Moldovite coloured cocoa butter
- 2.7g Pectin
- 85g Lime juice
- 21g Lemon juice
- Rind of half a lime
- 170g Sugar
- 46g Confectionery glucose syrup
- 4g Tartaric acid
- 6g Leaf gelatine (3 sheets)
- 30g Dextrose
- 1/2 Premium vanilla pod
- 19g Water
- 6g Invert sugar paste
- 120g Valrhona Ivoire
- 15g Cocoa butter
- 25g Browned butter
- 110g Gluten free cookies/biscuits - ground to a crumb
- 15g Roxy & Rich Snow White
- 3g Roxy & Rich Amber Honey
- Green/Blue Swirl Transfer Sheet
Method
Dessert flavoured chocolates are all the rage right now, so give your customers exactly what they want with our Key Lime Pie bonbon recipe! With layers of zesty lime gel, fluffy marshmallow and a buttery biscuit base, this recipe ticks all the boxes for a fresh, trend-led addition to your spring and summer chocolate range. We made it gluten-free by using free from gluten biscuits, but you can use any biscuit you like!
Decoration and Shelling
- 800g Valrhona Grand Cru Dark Chocolate; Macae
- 6g Roxy & Rich Green Moldavite cocoa butter
- 15g Roxy & Rich Snow White Cocoa butter
- 3g Roxy & Rich Amber Honey
- 2 Green/Blue Swirl Transfer Sheets
Fillings
For the Lime Gel
- 85g Lime Juice
- 15g Lemon Juice
- Rind from 1/2 lime
- 30g Sugar
- 2.7g Pectin
- 80g Sugar
- 15g Confectionary glucose syrup
- 4g Tartaric Acid
For the Marshmallow filling
- 6g Leaf Gelatine (3 sheets)
- 50g Sugar
- 30g Dextrose
- ½ Premium Vanilla Pod
- 19g water
- 6g Lemon Juice
- 31g Confectionary Glucose syrup
- 6g Invert Sugar paste
For the Biscuit Base
- 120g Valrhona Indulgent White Chocolate; Ivoire
- 15g Cocoa Butter
- 25g Browned Butter
- 110g Gluten Free Cookies/Biscuits – Ground to a crumb
Step 1 - Making the Shells
- Using a spray gun, paint a coat of Roxy & Rich Green Moldavite cocoa butter directly into the centre of the cavity. Before this sets, adjust the trigger on the spray gun in such a way that only air is released; this will push the cocoa butter up to the sides of the cavity and give a wave effect as the cocoa butter is rippled by the air. Repeat until each cavity is sprayed and leave to crystalise.
- Spray 2 layers of custom mixed cocoa butter into the mould and completely cover each cavity evenly. Leave to crystalise – preferably overnight, before shelling with tempered Macae.
Step 2 - Making the Gel
- Measure all ingredients into separate dishes using precise scales, so that they are all at ready for use.
- Combine 30g sugar and pectin with a small whisk, ensuring they are thoroughly mixed. Set aside for later.
- Combine the lime juice, lemon juice and rind in a pan and bring to around 80 degrees. Add 30g of the sugar and the pectin gradually whilst continuously whisking to avoid any lumps forming.
- Bring to the boil before adding the glucose. Let the glucose fully melt in the mixture before adding 80g sugar in 2-3 parts while stirring continuously.
- Heat the mixture to 106 degrees. Then, turn to a low heat and add the tartaric acid solution. Stir for around 20 seconds, until fully mixed.
- Remove from heat and pour into a bowl. Cover with clingfilm and leave in the fridge to fully cool.
- Once cooled, chop the gel up and pour into a jug. Blend with a hand blender until the gel is a consistency that can be piped into shells.
- Using a piping bag, pipe a small amount of gel into the top of each cavity and set it aside while you make the marshmallow filling.
Step 3 - Making the Marshmallow filling
- Place the gelatine sheets into a pan of water and leave to soak. Measure out all ingredients into separate dishes using precise scales, so that they are all prepared and ready to go when you need them.
- After the gelatine has soaked for around 20 minutes, drain and squeeze out excess water. Warm on a low heat until gelatine is fully melted and set aside.
- Pour the lemon and water into the sugar and dextrose, then warm on a low heat until all sugar is dissolved and add the vanilla seeds.
- Pour invert sugar and glucose into a mixer bowl and whisk for a few minutes, then add the warmed sugar mixture and whisk on a high heat for a minute.
- While the mixer is still whisking, pour the warmed gelatine mixture into the bowl and continue to whisk for 2 minutes.
- Be careful not to overbeat, as you want to be able to pipe the mixture into the mould and it level off nicely.
- Allow the mixture to cool to low 30’s while the mixer whisks on the lowest heat to keep the marshmallow moving.
- Pour into a piping bag and pipe into your mould on top of the lime gel, making sure to leave about 3-4mm for the cookie base and capping off.
- Set aside to set while you make the biscuit base.
Step 4 - Making the biscuit base
- Start by grinding the cookies or biscuits into a fine crumb. You can do this with a pestle and mortar, a bowl and a flat edged rolling pin, or with a blender.
- Melt the chocolate and cocoa butter to around 35 degrees. Separately, melt 25g butter until it browns
- Pour the chocolate and browned butter over the biscuit crumb and mix well, before pouring into a jug and blending with a hand blender until smooth.
- Cool to low 30’s and pipe a small amount into each cavity. If this does not level straight away, give the mould a little shake to distribute the mixture evenly.
- Allow to set before retempering your leftover Valrhona Macae and cap your chocolates with the trasfer sheet.
- Leave to set for at least an hour before turning out of the mould.
Enjoyed this recipe? Try making scrumptious Lemon Meringue Pie bonbons by swapping the lime gel for lemon gel, and decorating with Roxy & Rich Coloured Cocoa Butter in Yellow Jasper!
Approximate costs
Add ingredients to your order
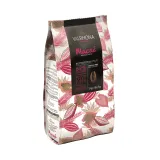
Valrhona
Valrhona Macae 62% Grand Cru Dark Chocolate
Feve; Minimum Cocoa Solids 62%
SCC5020
With an overall fruity note, this dark chocolate is an experience to be savoured, whether used in desserts or in a simpl...

In-stock: 16
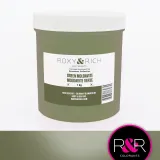
Roxy & Rich
Coloured Cocoa Butter; Green Moldavite
1kg; Gemstone E171 Free
SCR1444C
Out of stock - No ETA: To Order Only
Keylink
Pectin 200g
SCA132
MSK's Slow-Set Pectin is the perfect pectin for making pâte de fruits. It's designed to set a little...
In-stock: 11
Glucose Syrup
Confectionery Glucose Syrup
with 38 Dextrose Equivalent
SCA118
Generally used in addition to sugar, glucose prevents the recrystallization of sugar and improves the stability of the p...
In-stock: 54
Keylink
Tartaric Acid 500g
SCA134
Will convert sucrose to invert sugar which makes your sugar more pliable and easier to work with. A white, almost crysta...
In-stock: 7
SOC CHEF
Leaf Gelatine
Gold gelatine; Jelly strength 185-230g Bloom
SCA142
Leaf gelatine tends to be favoured by professionals as it gives a smoother, clearer consistency than powdered gelatine....
In-stock: 48
Vanillabazaar
Premium Vanilla Pods; 10 Pod Glass Tube
Grade A Black Madagascan Vanilla; 17-20cm
SCF0573
This vanilla is perfect as a flavouring for bakers, chocolatiers, chefs and patisserie chefs alike! Why choose pre...
In-stock: 48
Invert Sugar and Invertin
Invert Sugar Paste
SCA107
Used to hold in moisture (it is hydroscopic and draws in moisture from the surrounding environment) and causes substance...
In-stock: 4
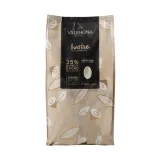
Valrhona
Valrhona Ivoire 35% Indulgent White Chocolate
Feve; Minimum Cocoa Solids 35%
SCC5200
The iconic Valrhona Ivoire 35% white chocolate is a balanced couverture with a luxurious mouthfeel and vanilla notes to...
In-stock: 77

Roxy & Rich
Coloured Cocoa Butter; Snow White
1kg; Artist E171
SCR1000C
Out of stock - No ETA: To Order Only
Roxy & Rich
Coloured Cocoa Butter; Snow White
1kg; Artist E171
SCR1000C
Out of stock - No ETA: To Order Only
Roxy & Rich
Coloured Cocoa Butter; Amber Honey
1kg; Gemstone E171 Free
SCR1396C
Out of stock - No ETA: To Order Only
Roxy & Rich
Coloured Cocoa Butter; Amber Honey
1kg; Gemstone E171 Free
SCR1396C
Out of stock - No ETA: To Order Only
Miscellaneous
Transfer Sheets; Swirls Blue/Green
290x390mm
SDS519
Anyone else feeling a bit dizzy? These boggling swirls will have your customers in a tizzy! If you haven’t used tr...
In-stock: 15
Miscellaneous
Transfer Sheets; Swirls Blue/Green
290x390mm
SDS519
Anyone else feeling a bit dizzy? These boggling swirls will have your customers in a tizzy! If you haven’t used tr...
In-stock: 15